- About Journey Casual
- Installation Our Theme
- Store Configuration
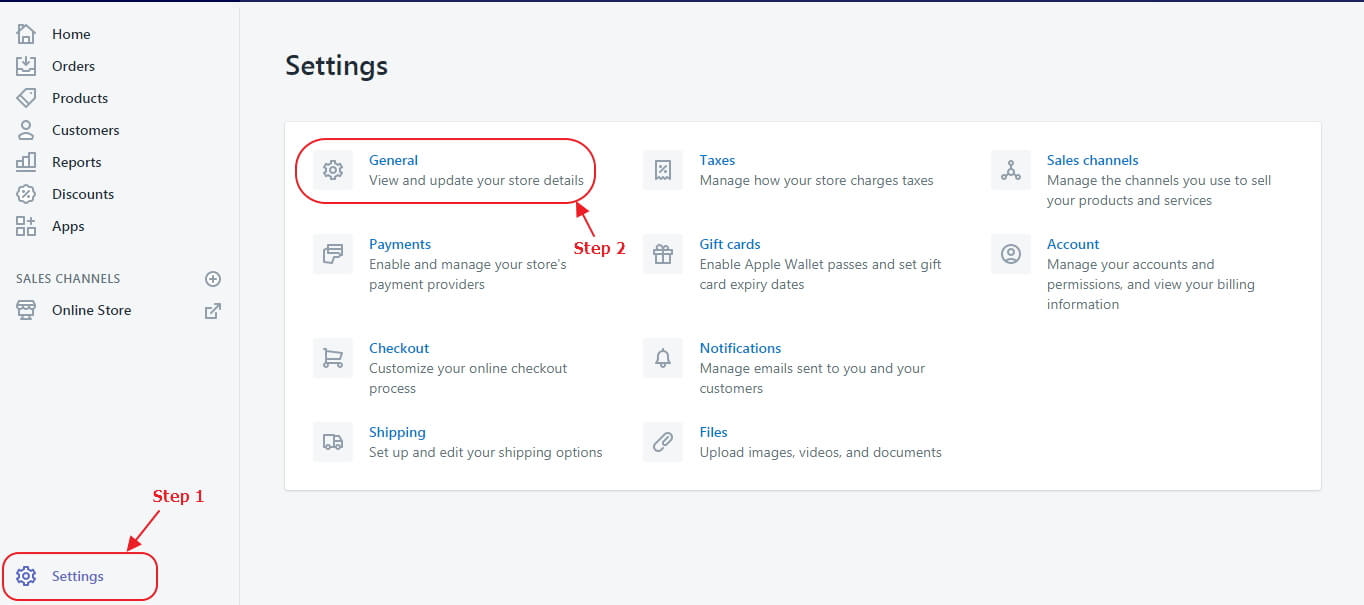
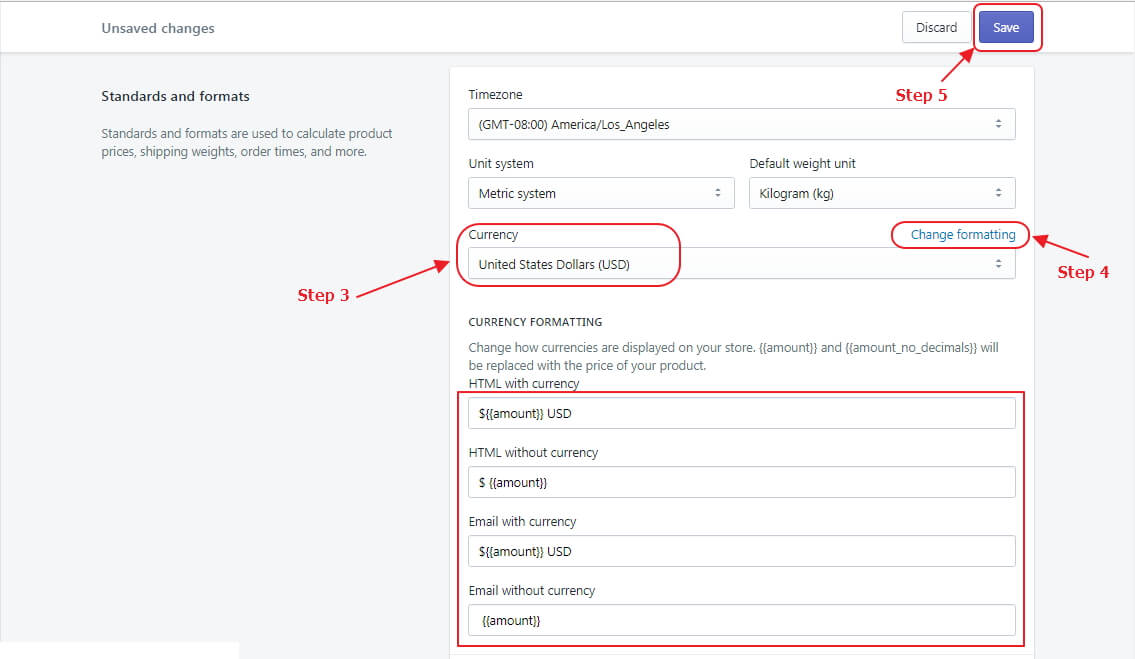
- General Settings
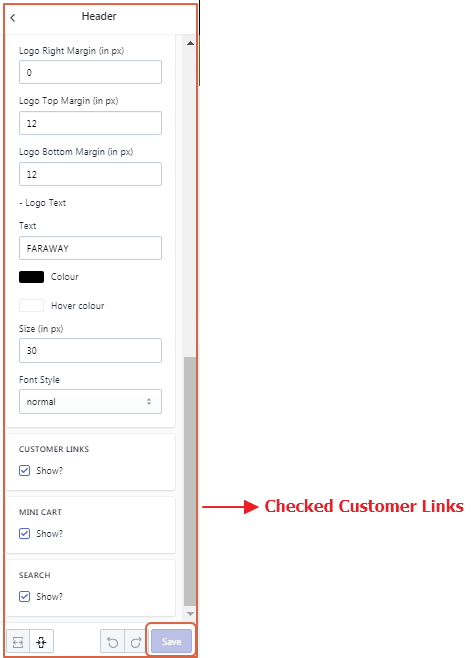
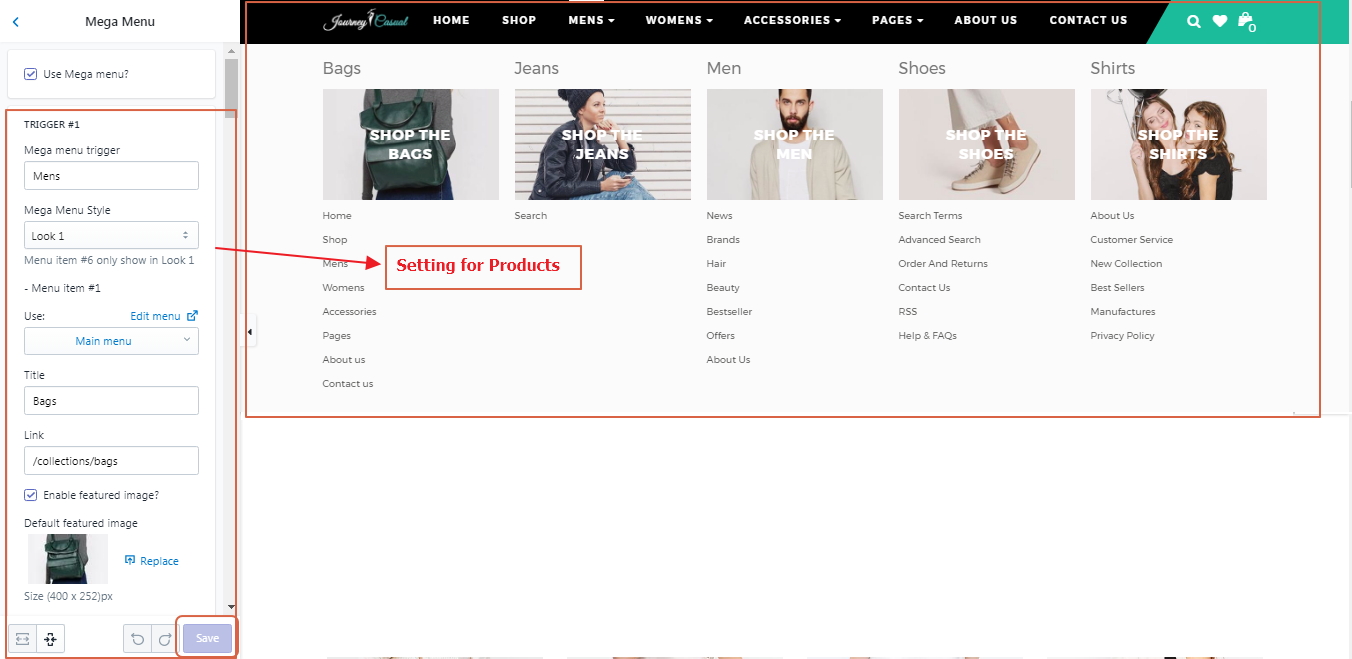
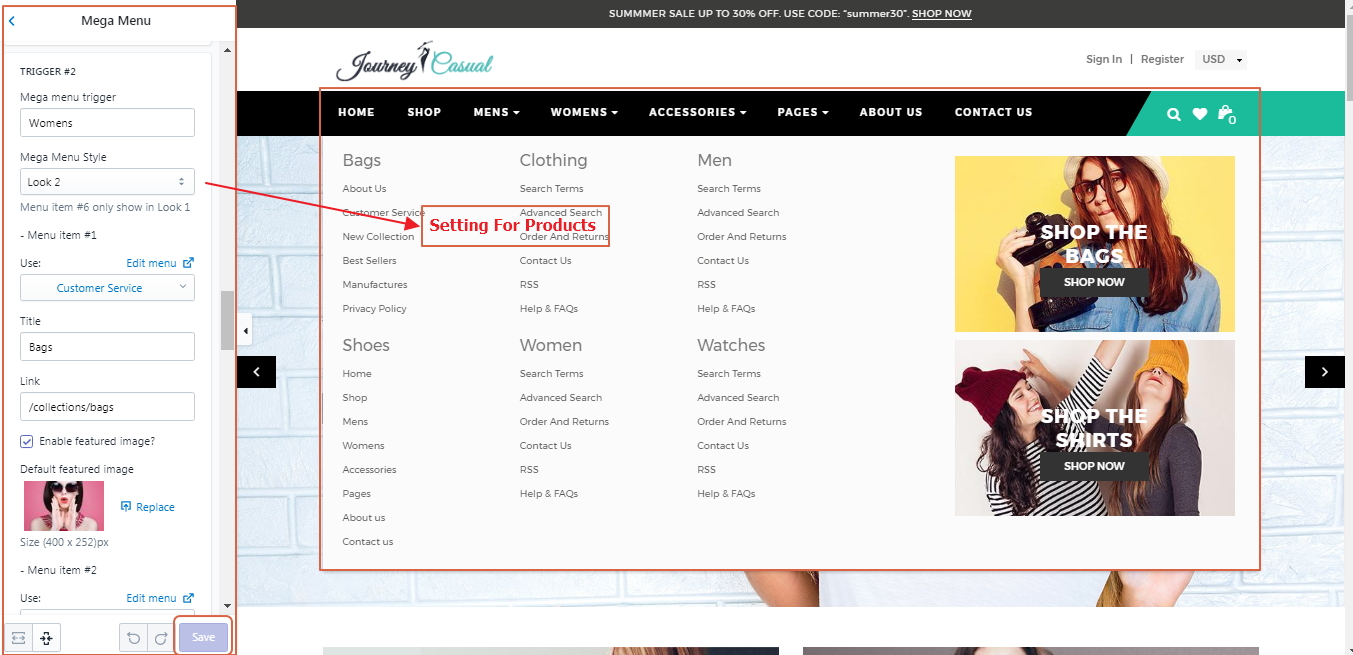
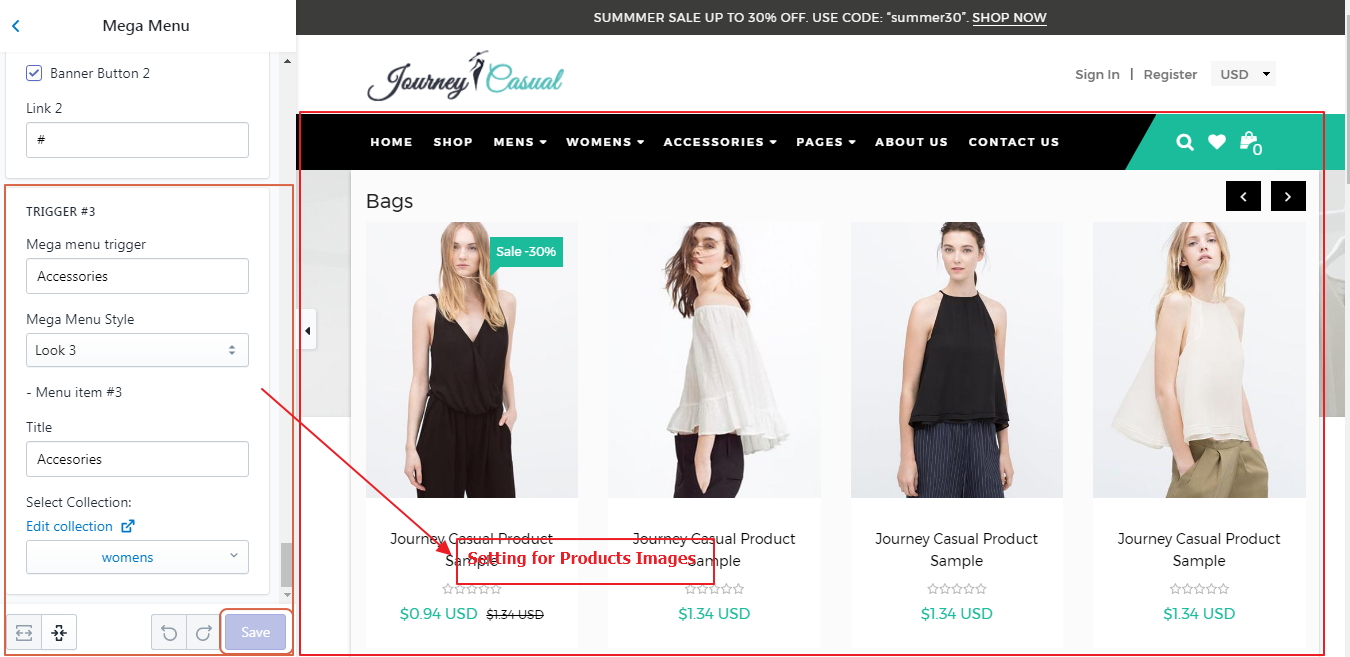
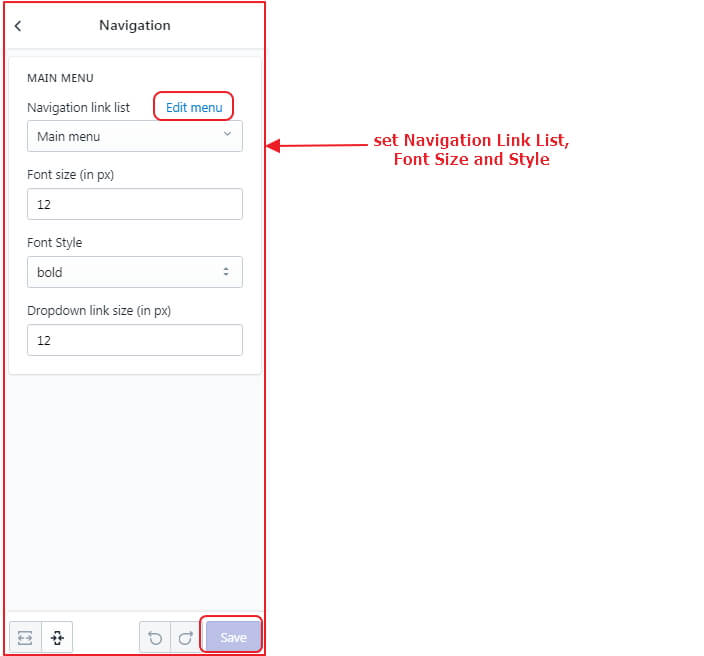
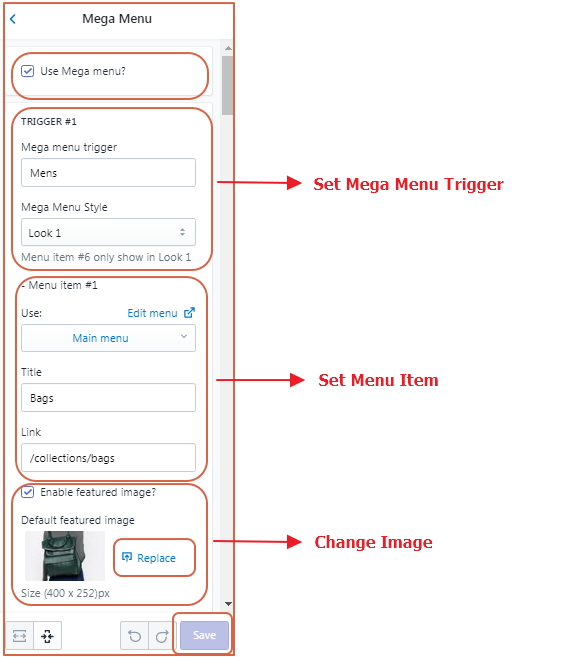
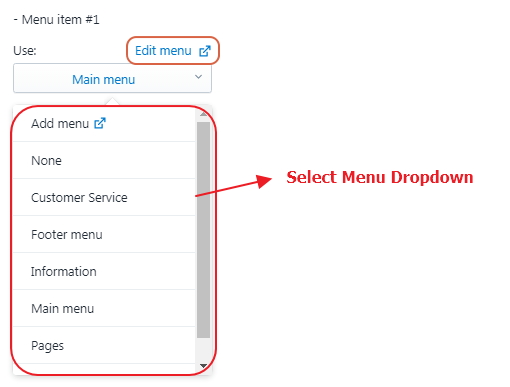
- Navigation
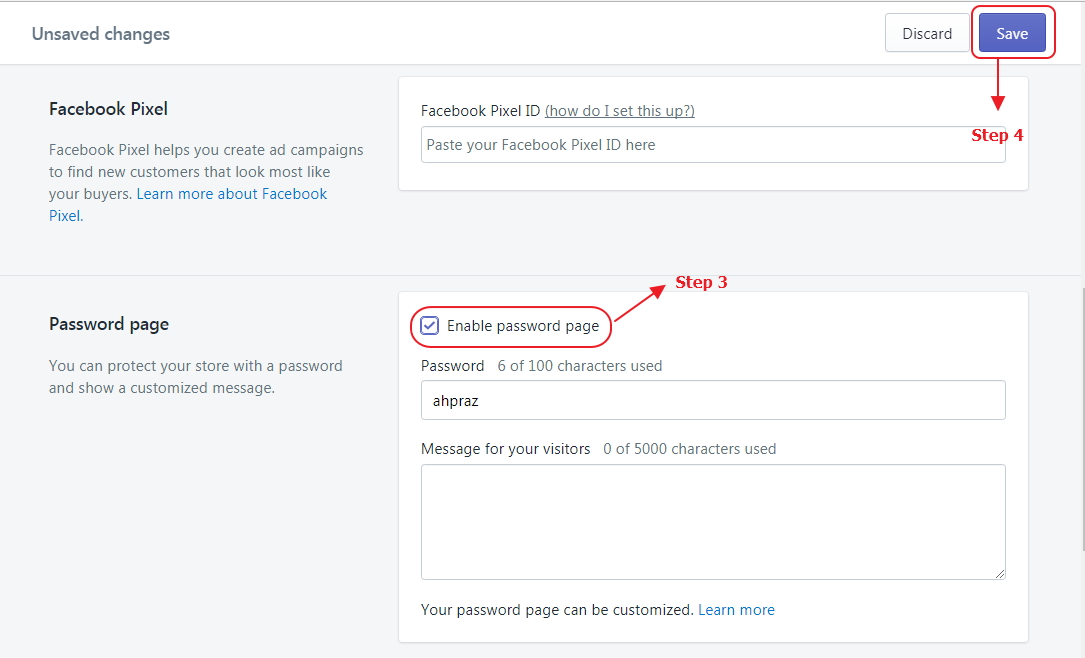
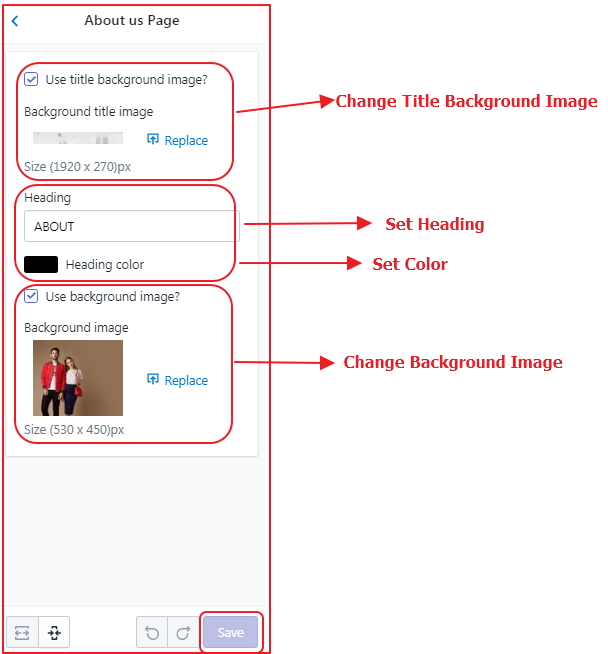
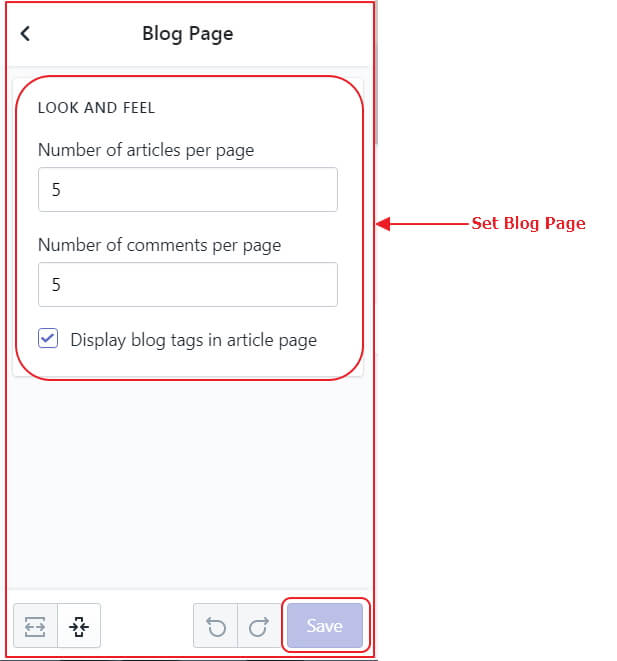
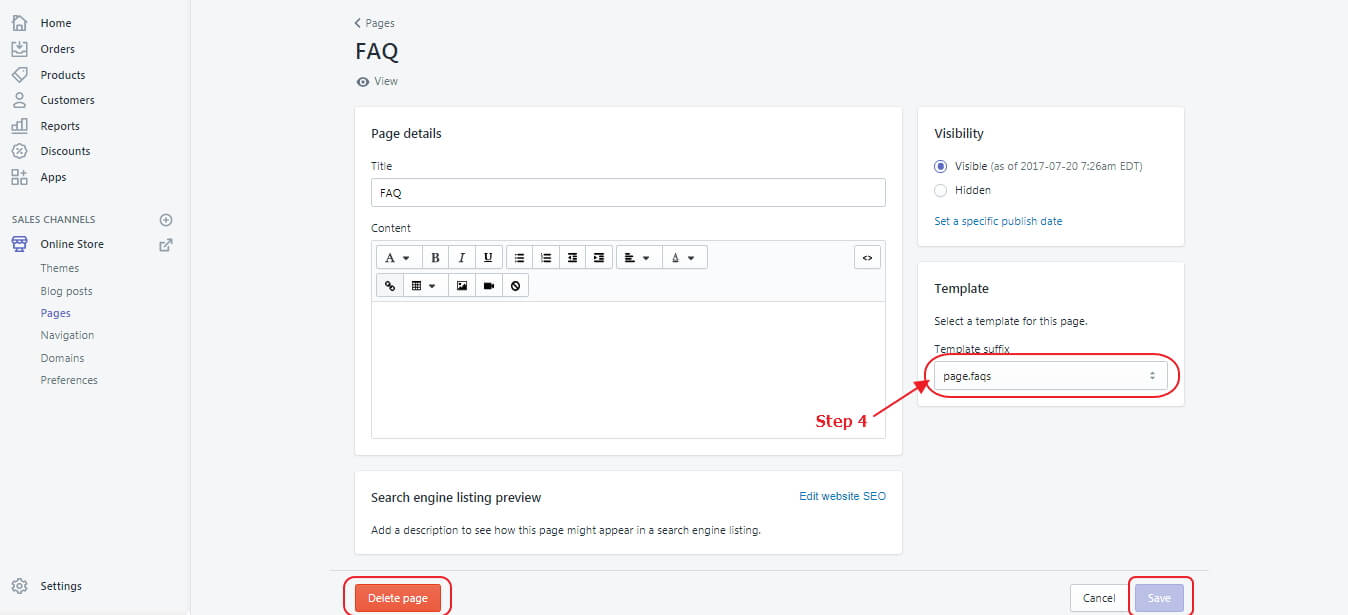
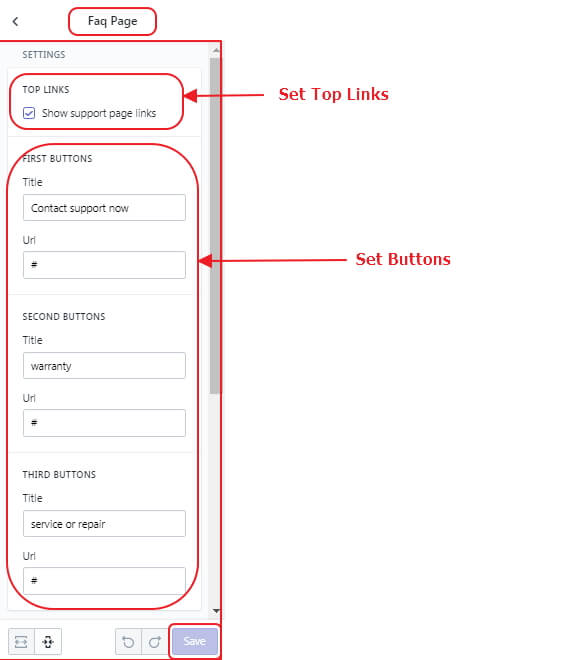
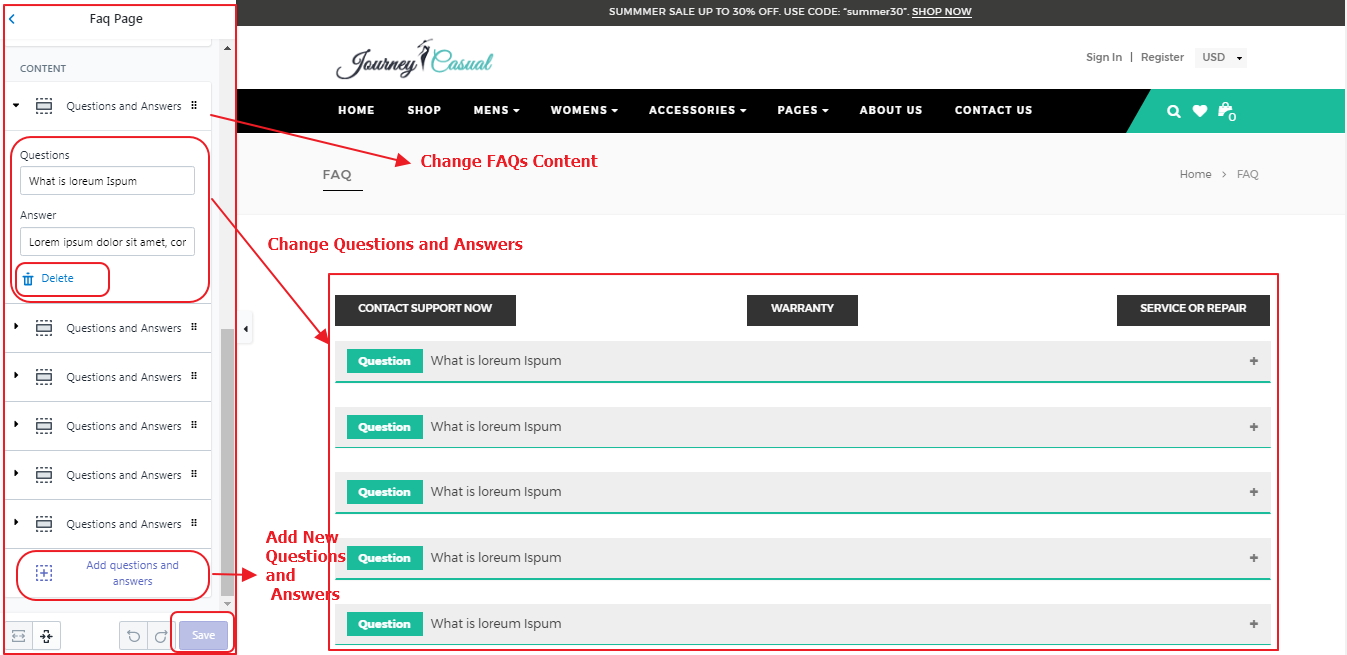
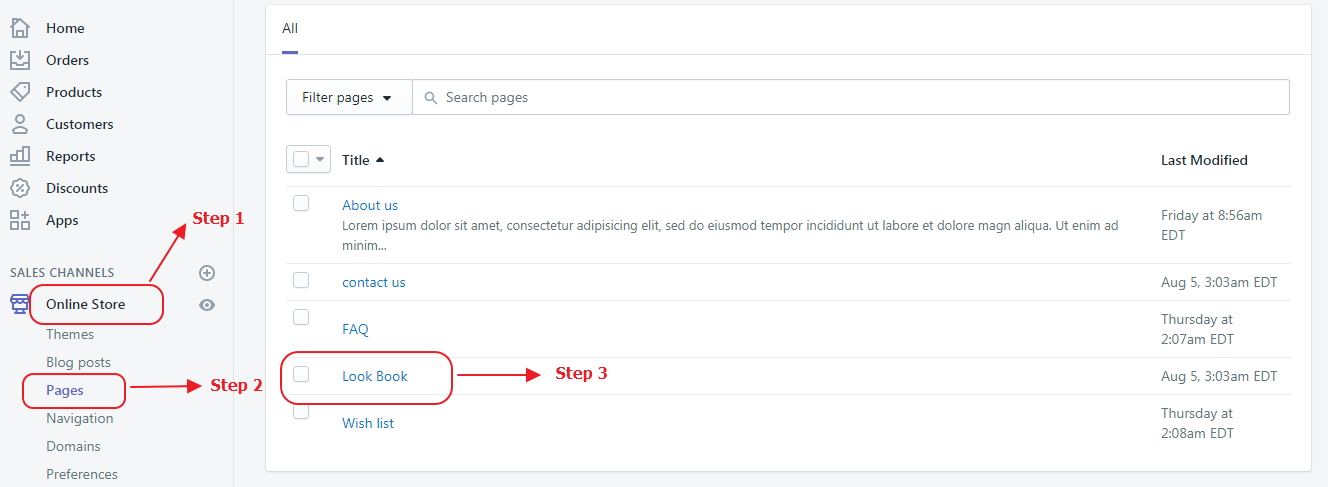
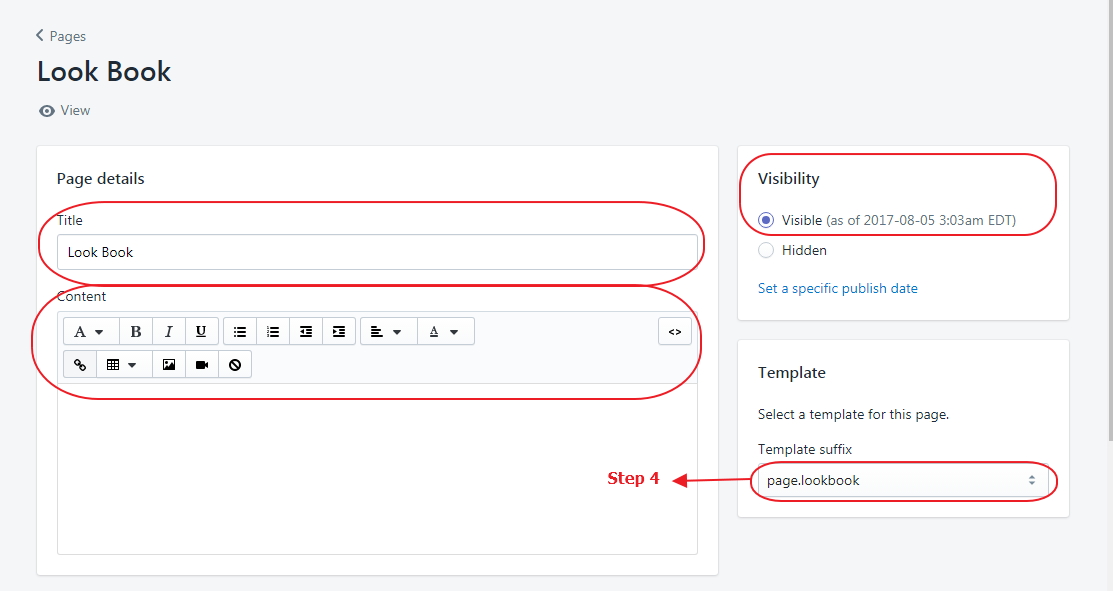
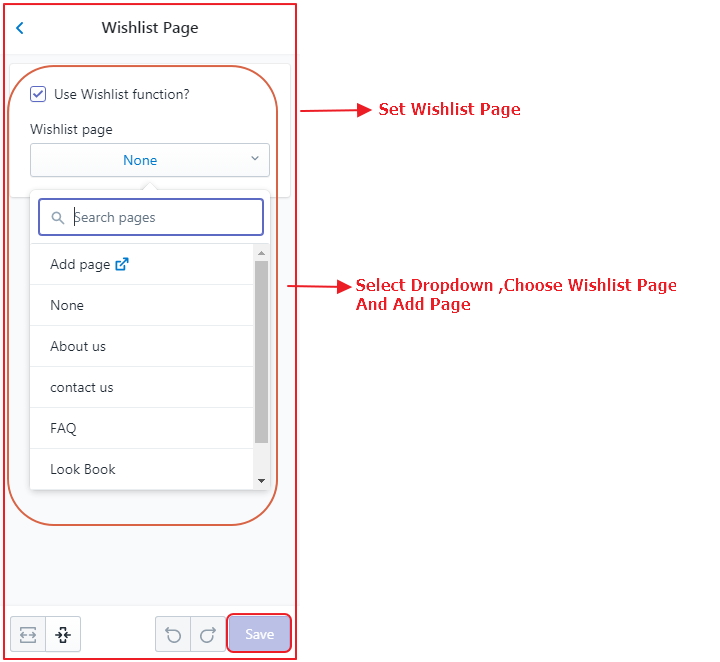
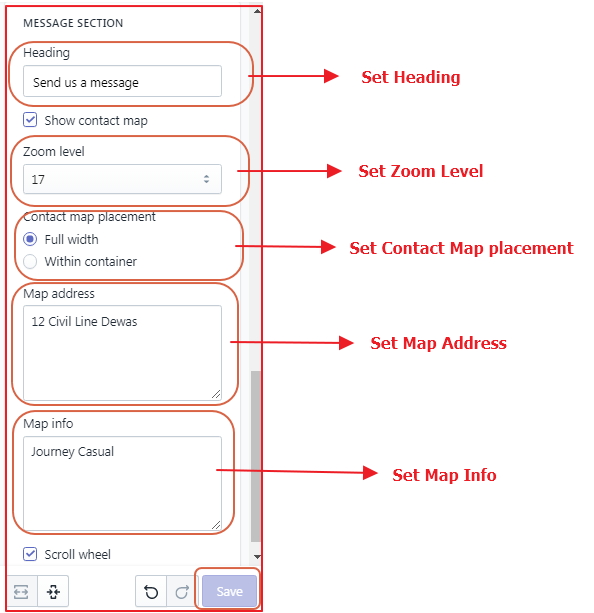
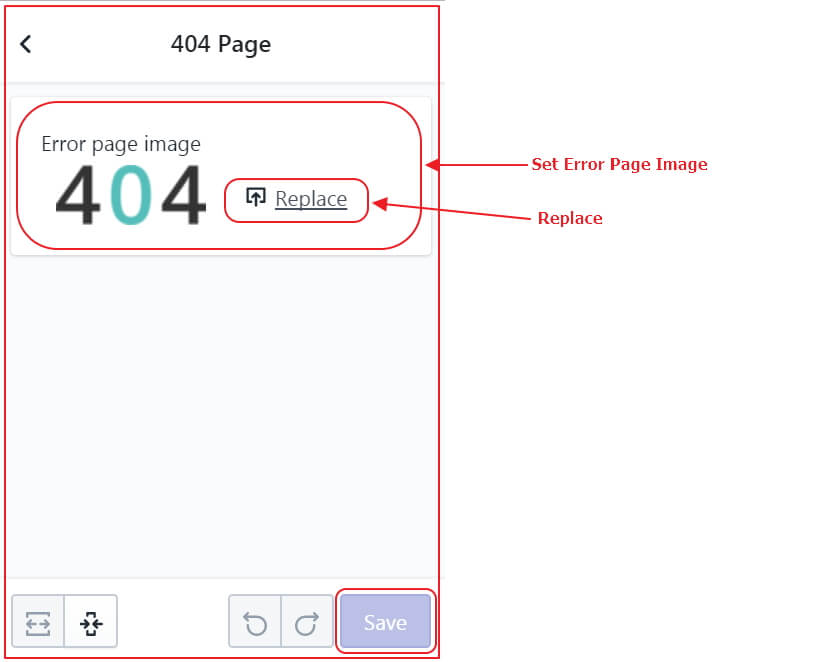
- Page Settings
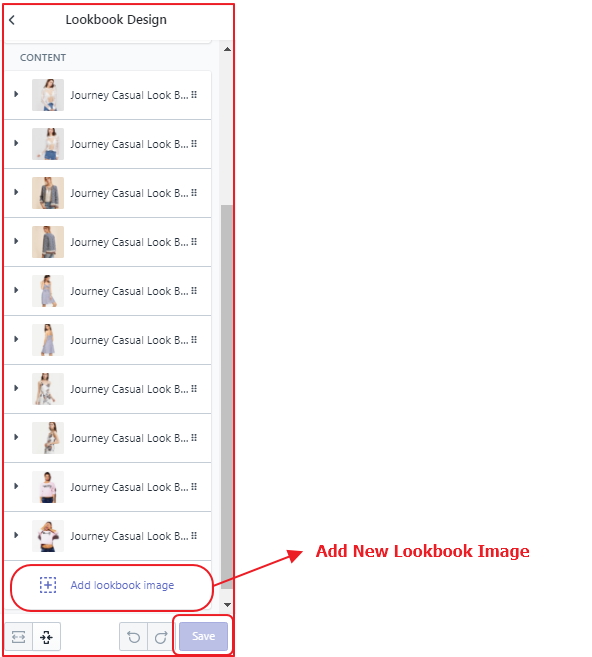
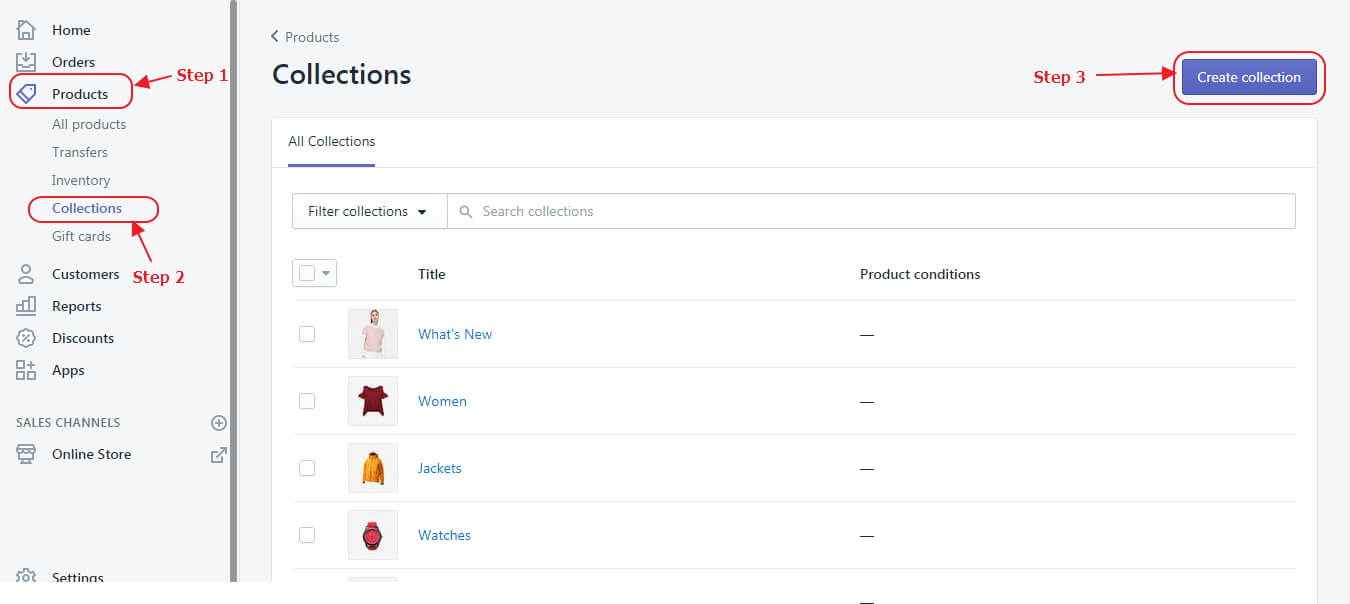
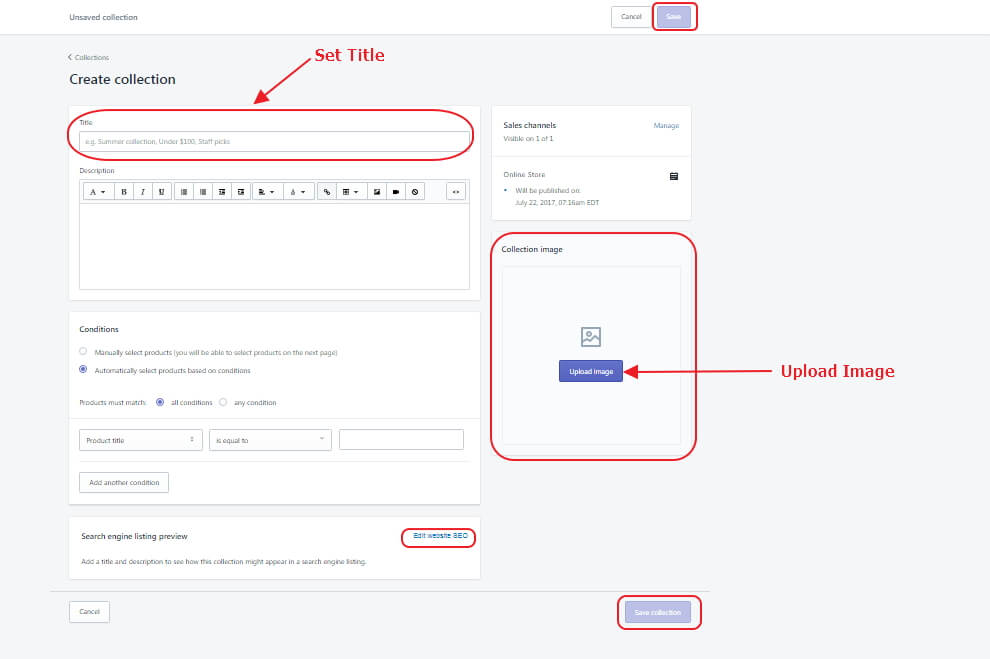
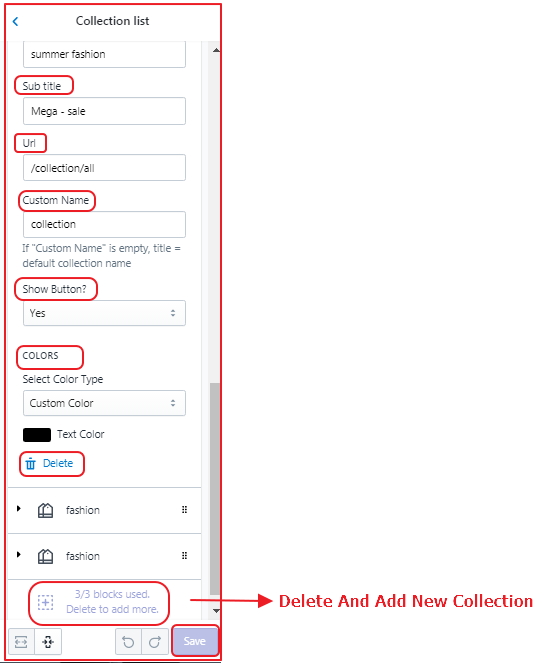
- Collection Page Setup
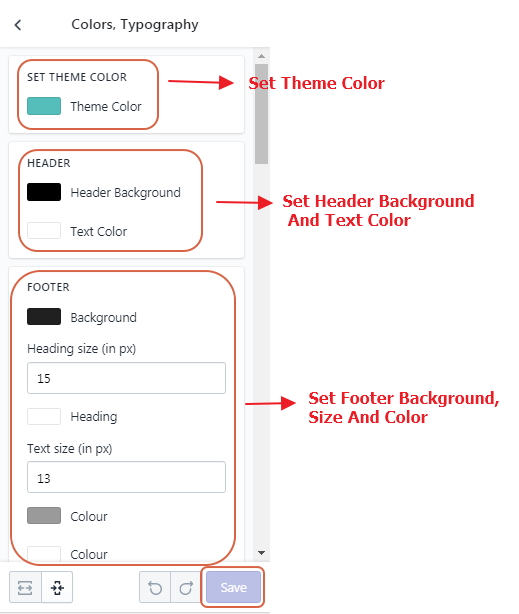
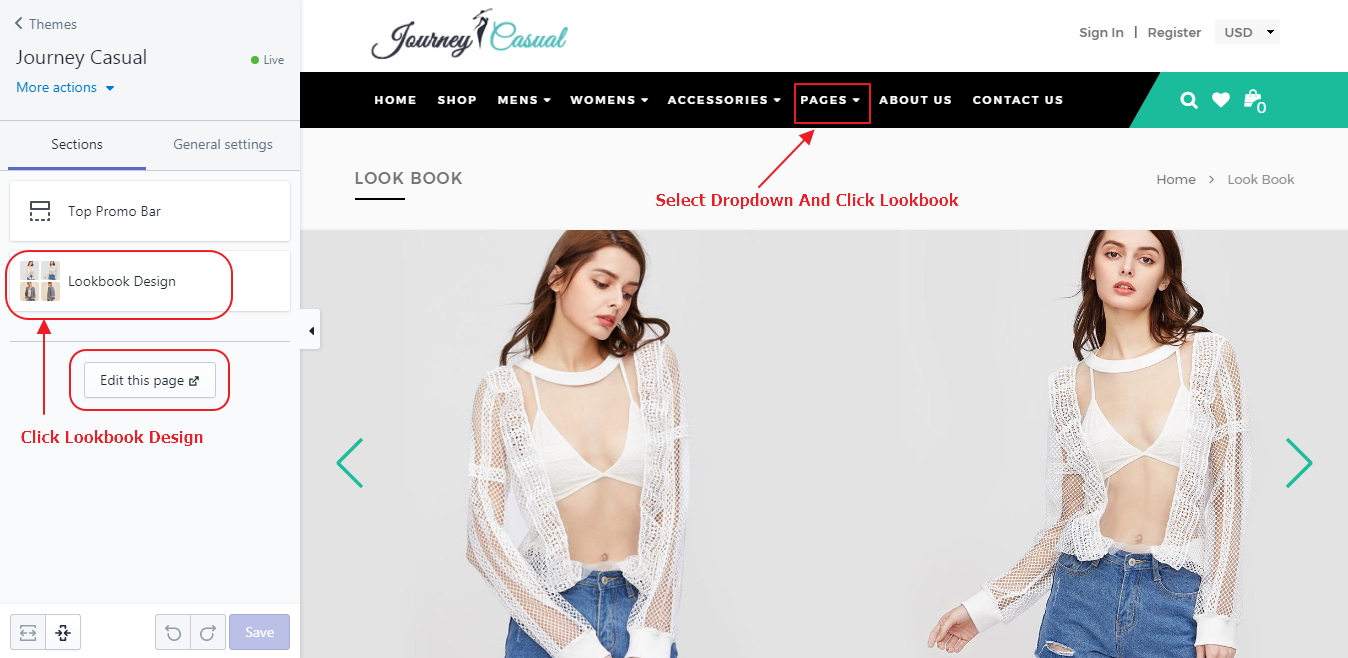
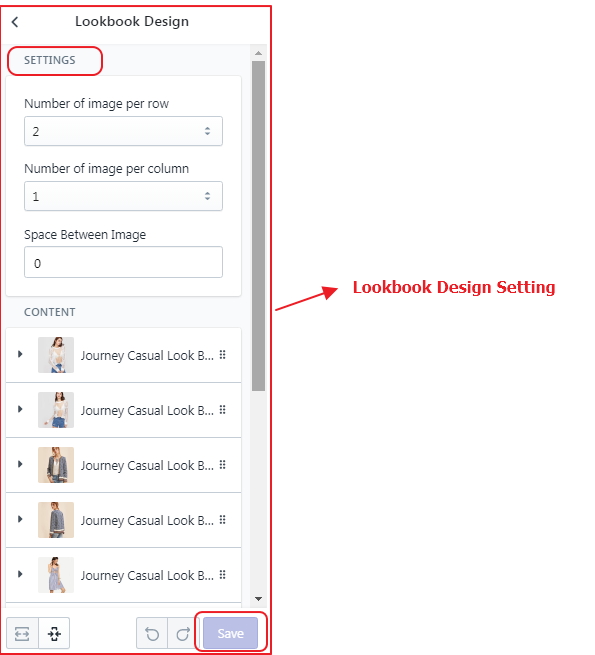
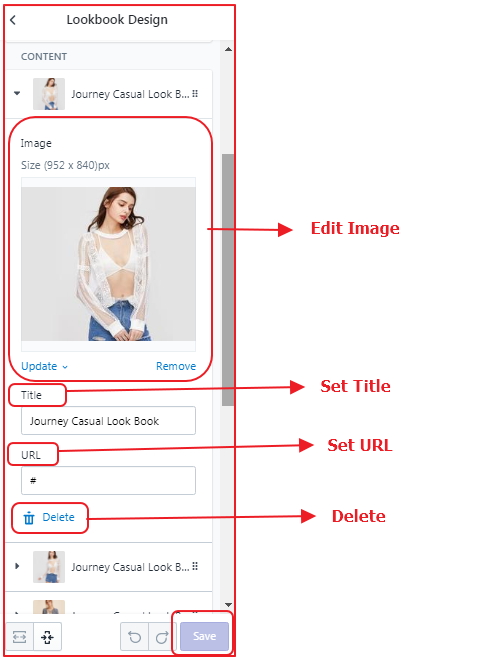
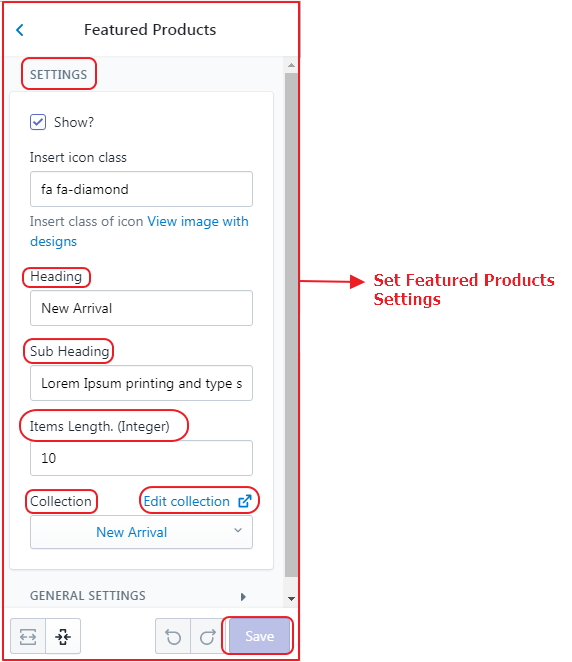
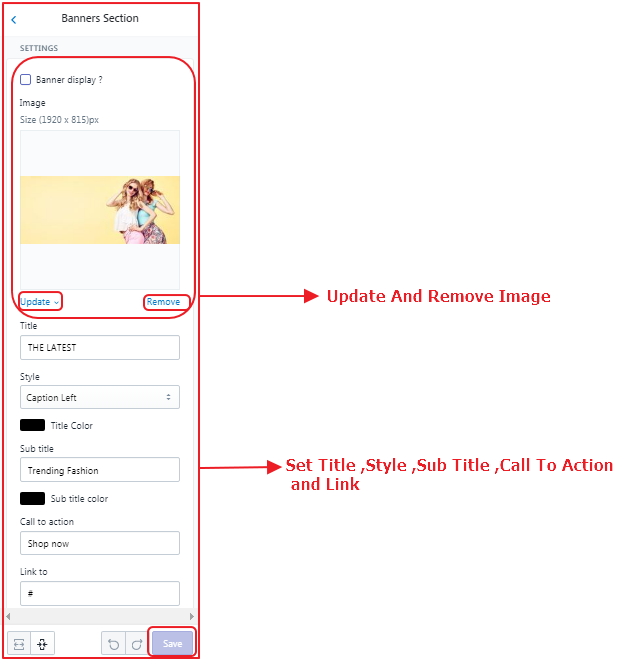
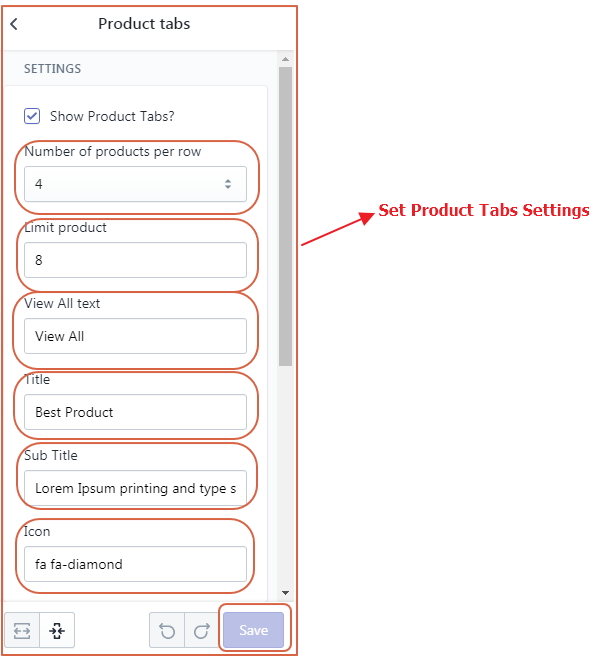
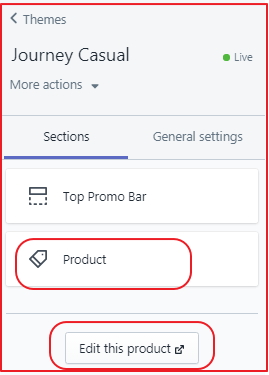
- Theme Sections
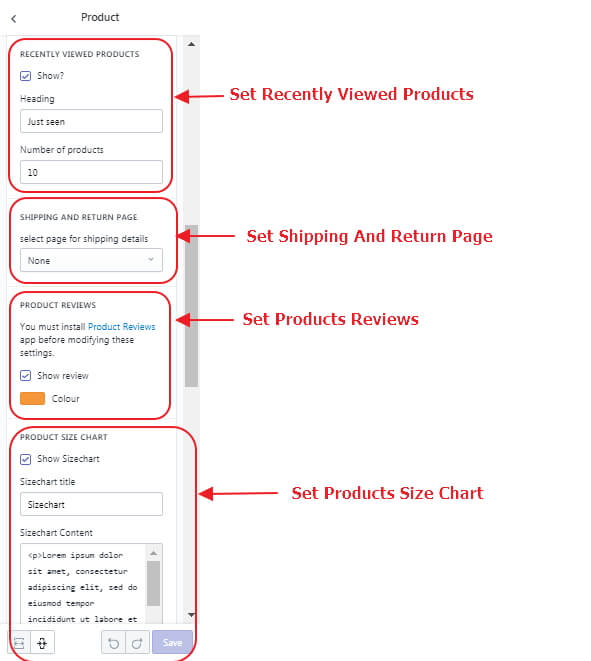
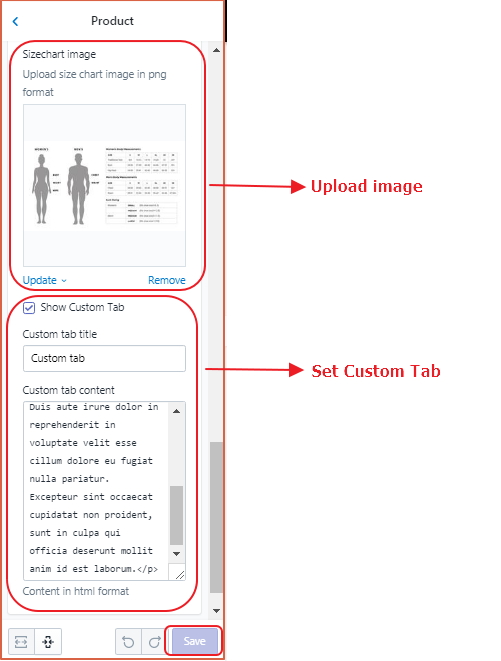
- Product Page Section
- Footer
Copyright © 2017 JourneyCasual and All Rights Reserved.

Journey Casual is a Fashion & Clothing Shopify theme for your online store. The clean & elegant design is perfect for your store. It’s a unique responsive theme that is fully customisable and easy to manage, Enhanced theme customization with sections you are getting more flexibility when customizing your store. Mega menu gives the best user experience Perfect for selling clothing, women fashion, fashion, accessories, high fashion, men fashion, jewelries, digital, glasses, kids, shoes, watches, bags.
The theme comes with best support doc for the installation, customisation and theme management that you can manage yourself without any coding knowledge. Even if you need any further support that you can’t manage yourself feel free to raise a support ticket or send us an email : support@desideals4u.com we will get back to you within 12 hours time.
After purchased our theme, you need to go your download area, click on button Download and select download All files & documentation. Once the download is complete, unzip the file and you would see the following packages:
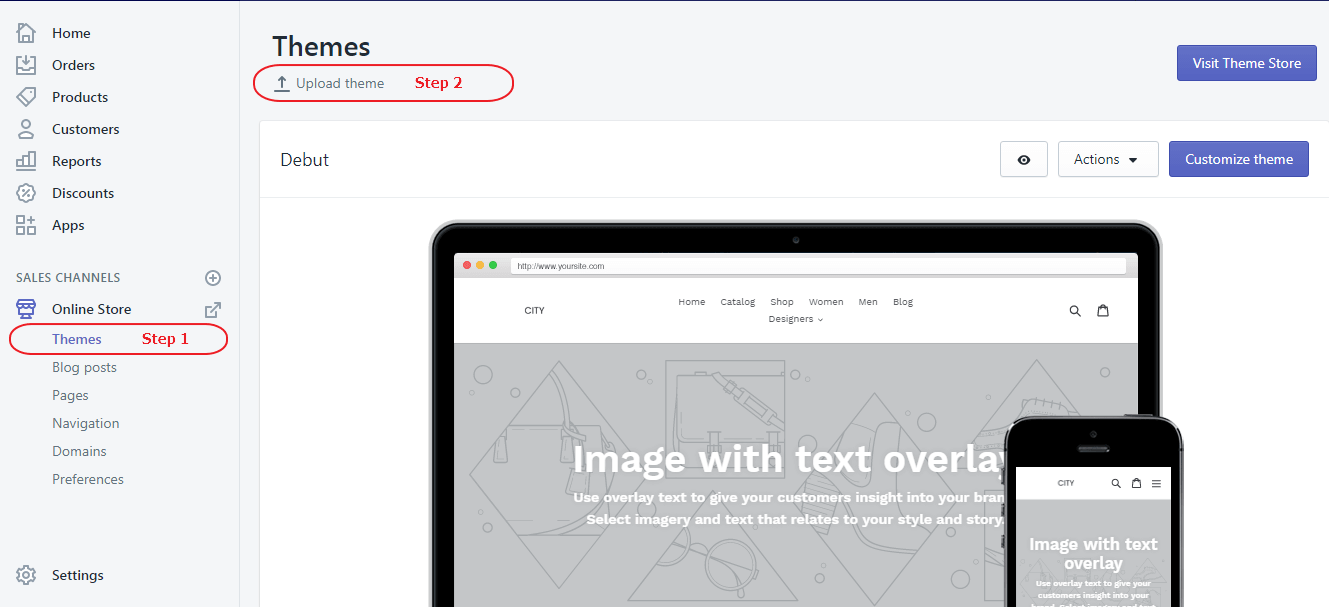
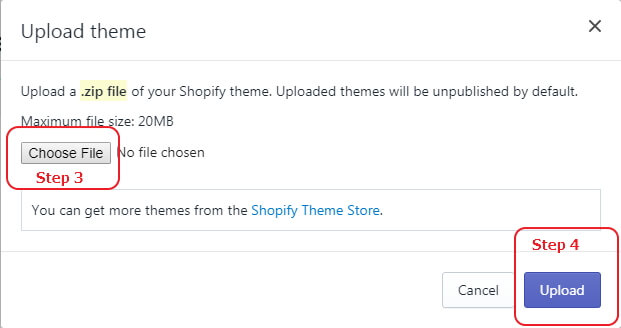
To install the theme, log in to your Shopify store and go to the Themes. From there, click on Upload a Theme and upload the .zip file from the ‘upload’ folder included with this package.
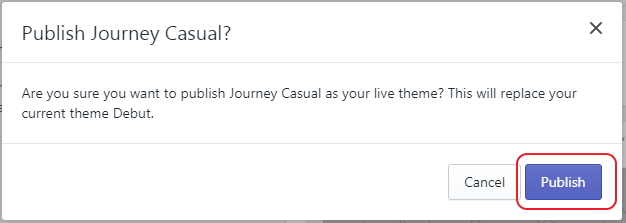
If your store is currently live and using a different theme, you select button Publish theme what you have just upload.

To enable product review, please install below app:

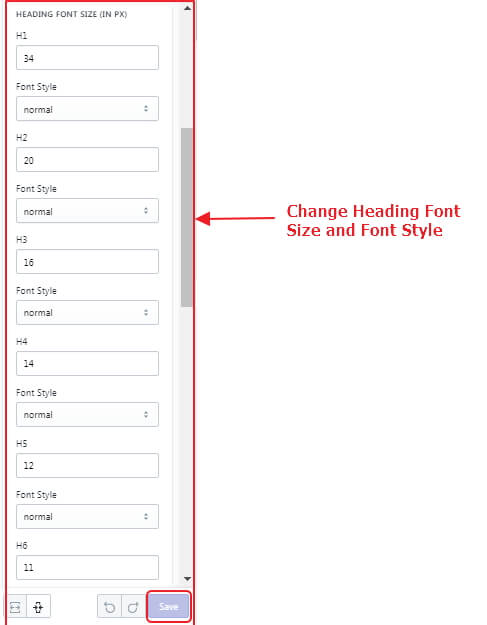
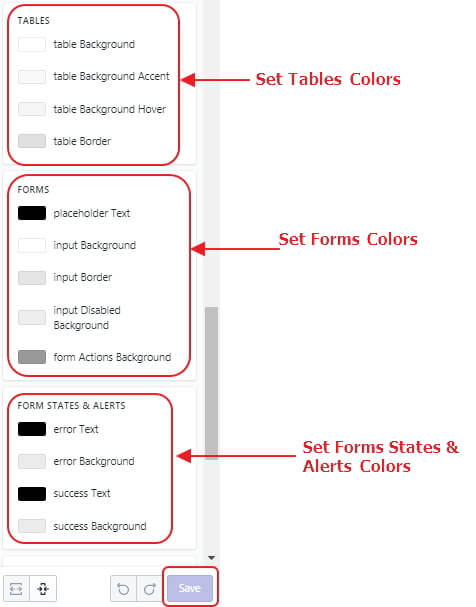
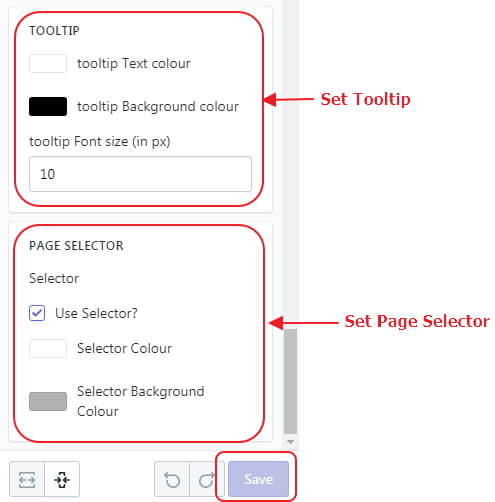
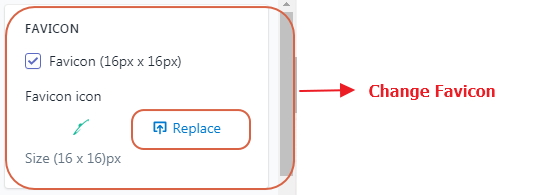
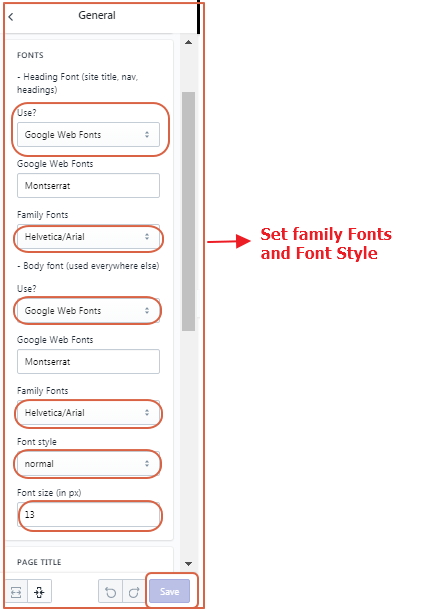
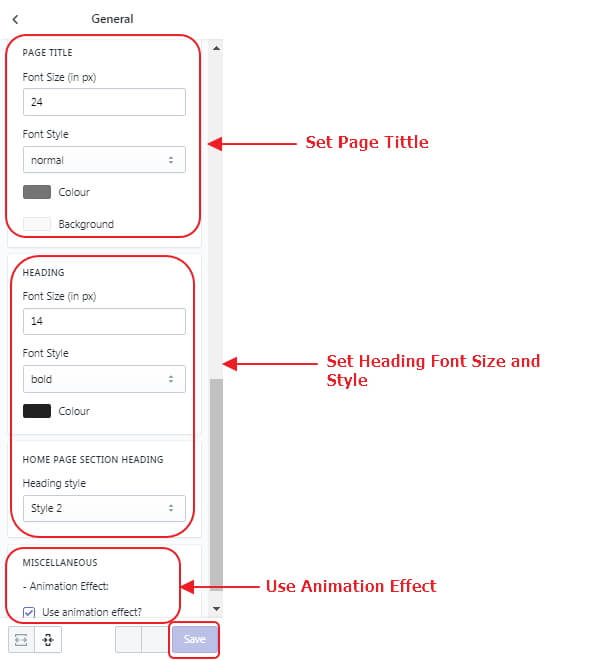
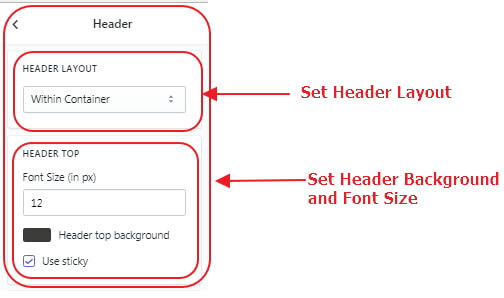
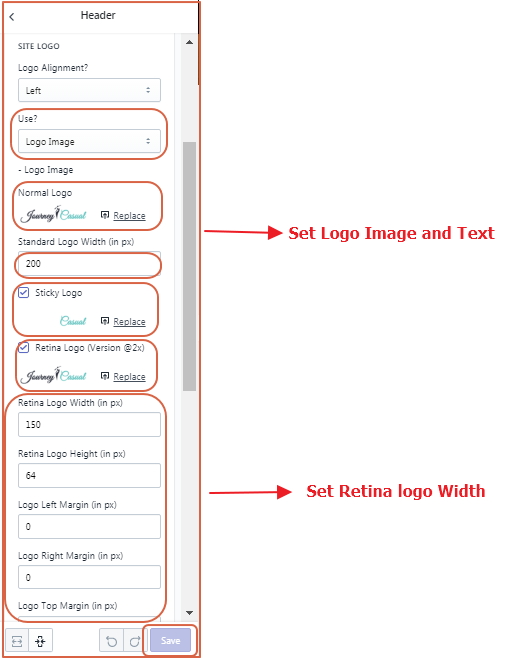
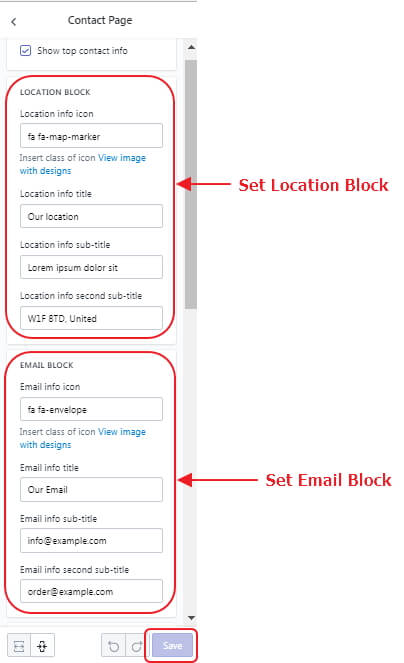
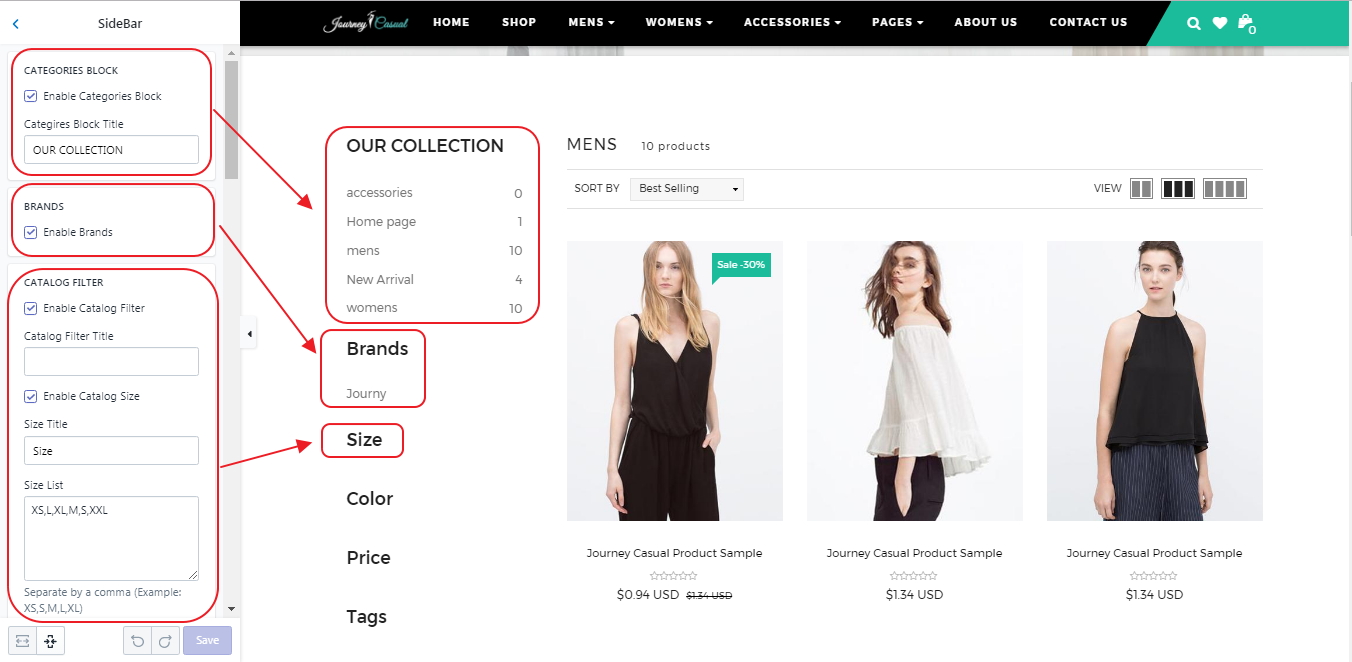
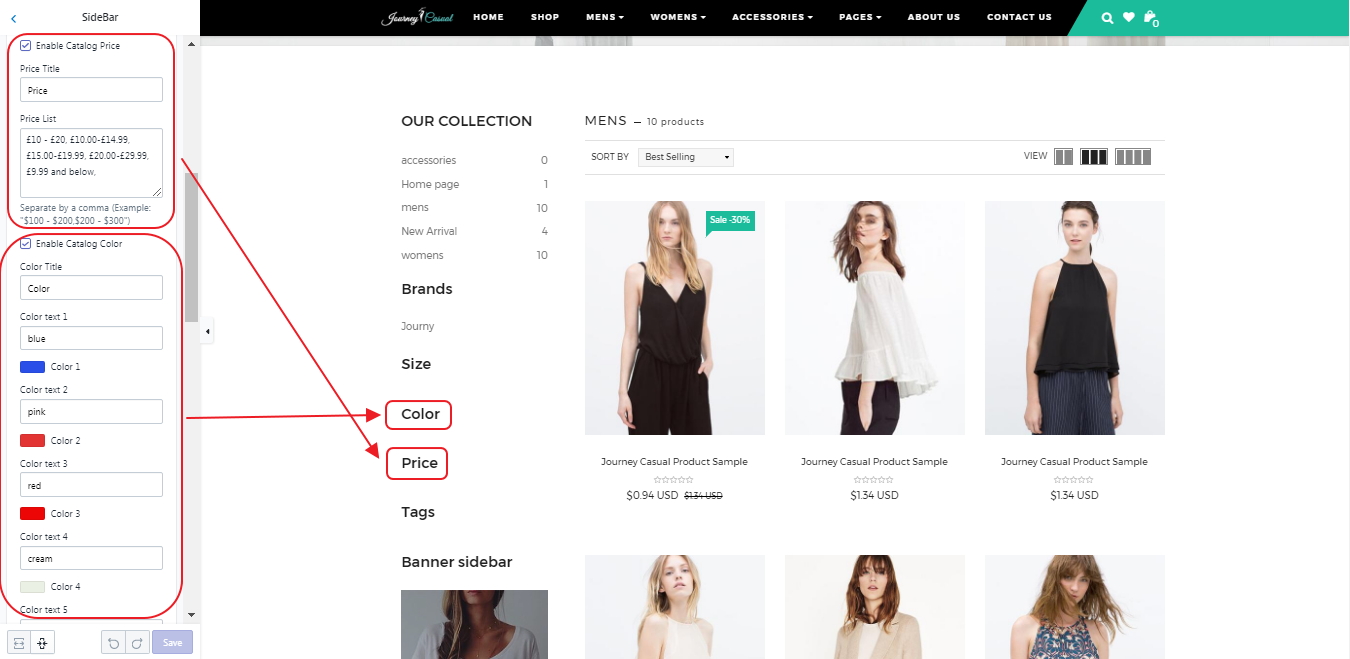
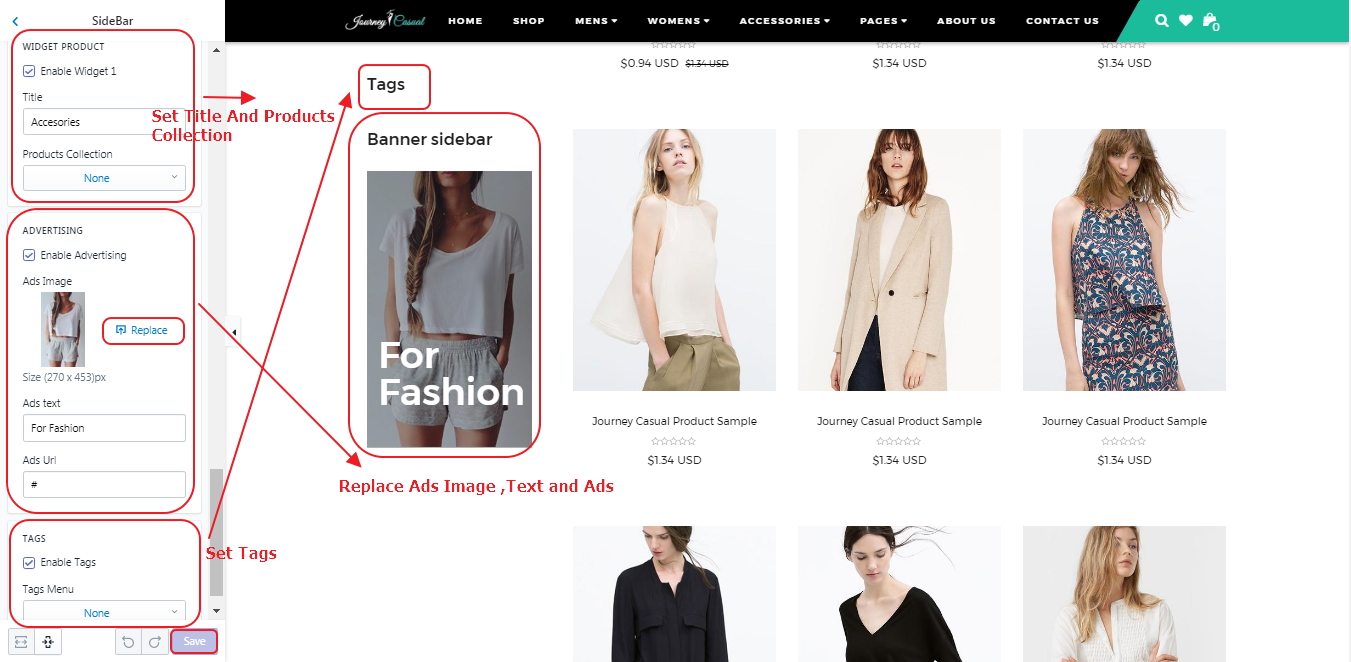
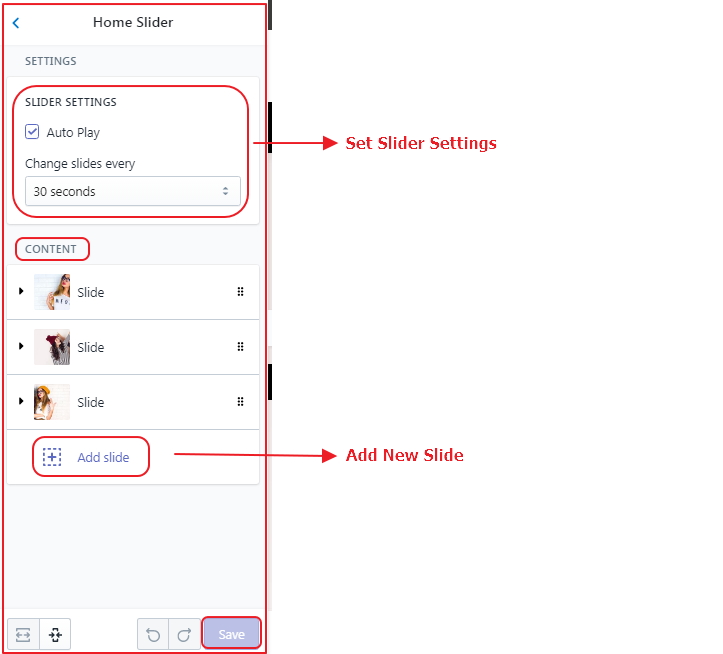
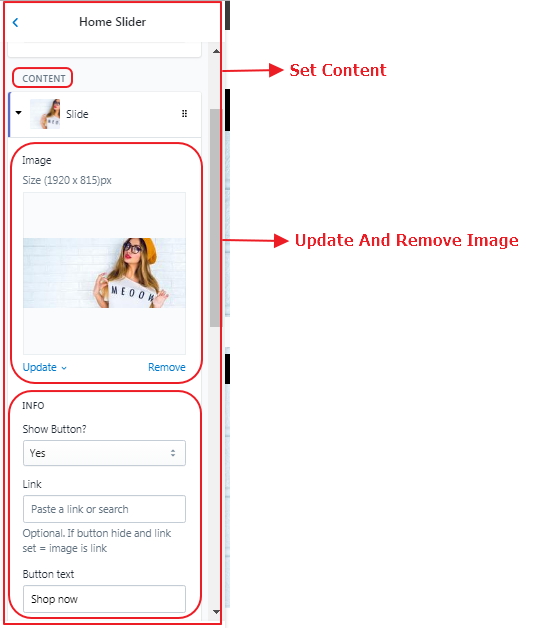
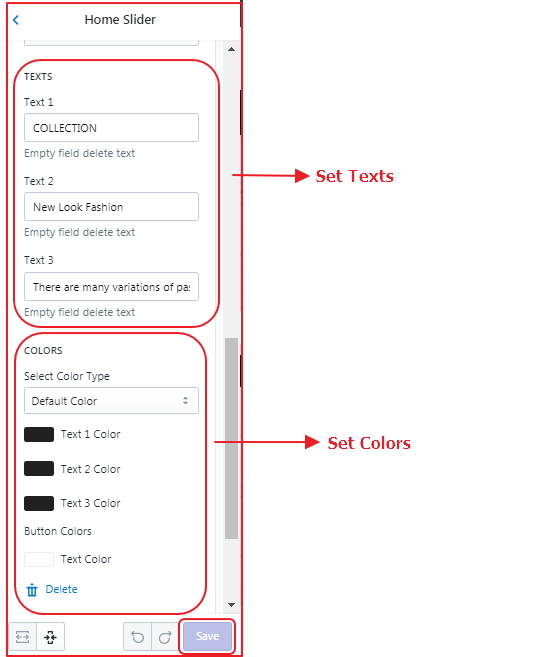
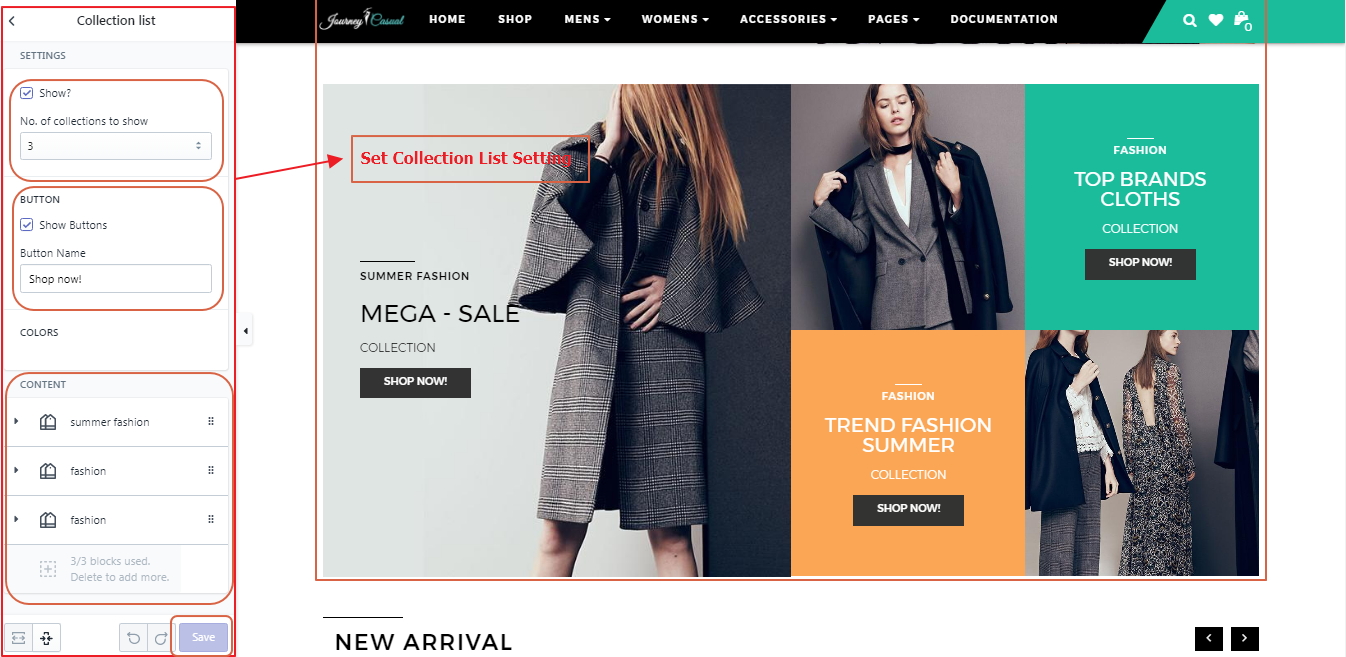
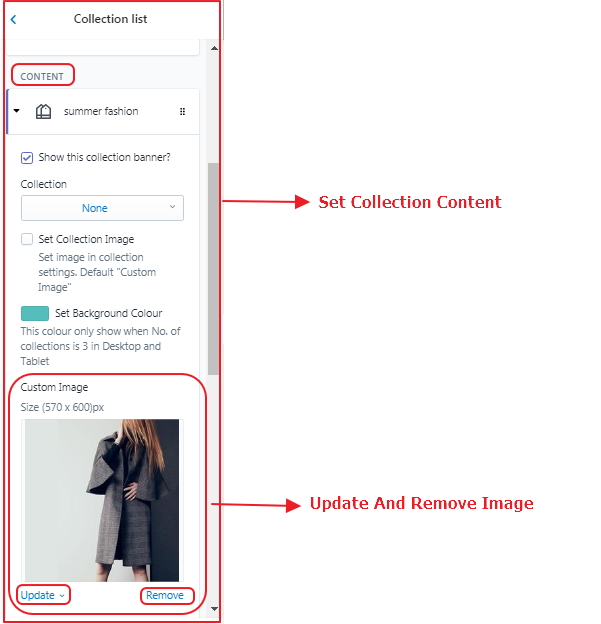
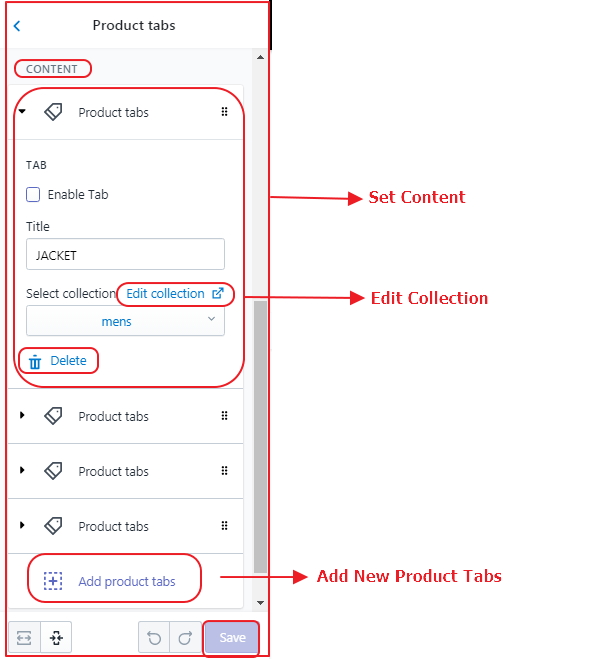
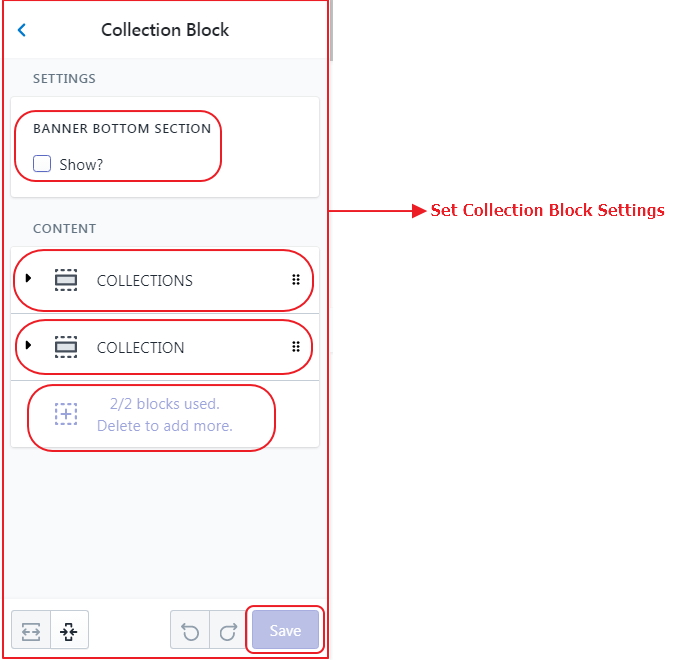
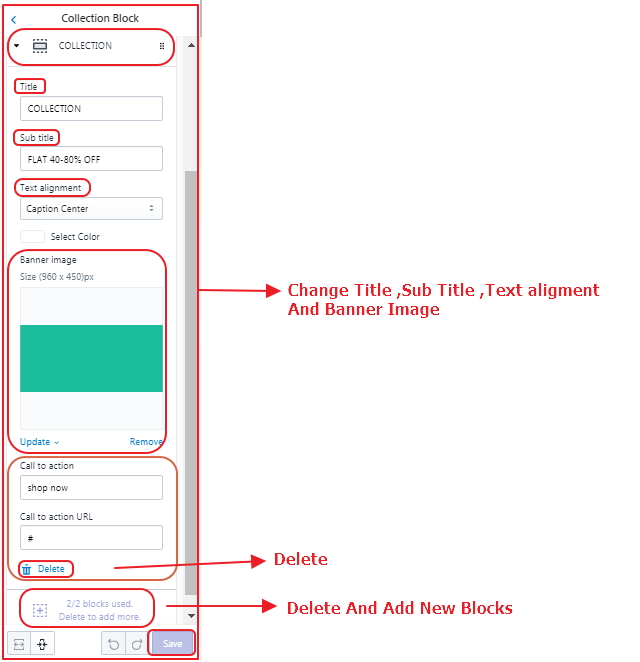
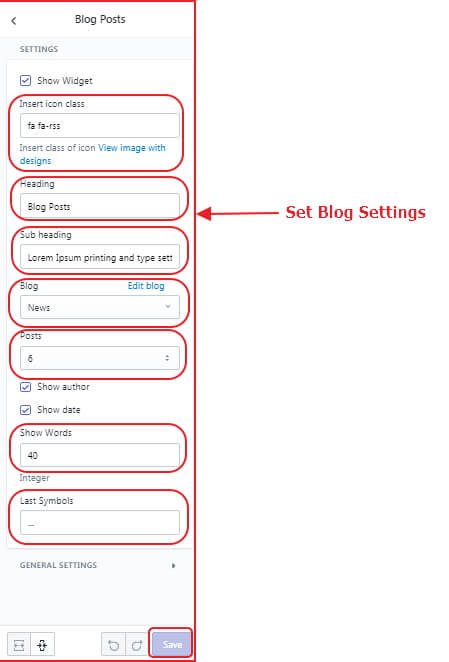
Now you can customize below
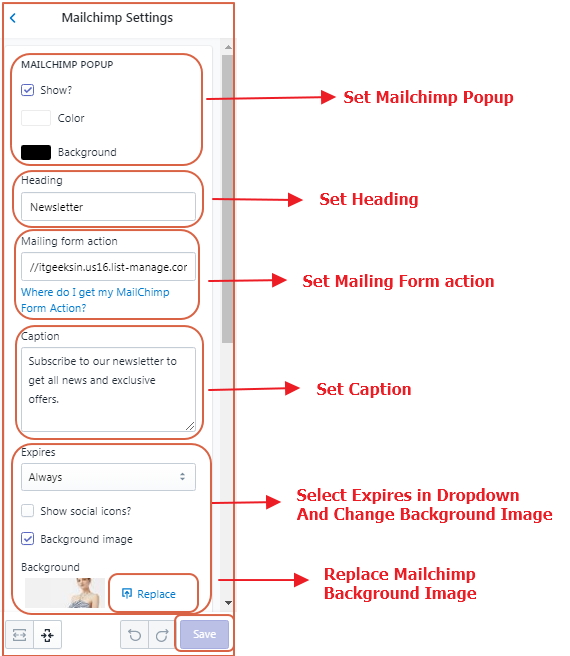
Now you can customize below
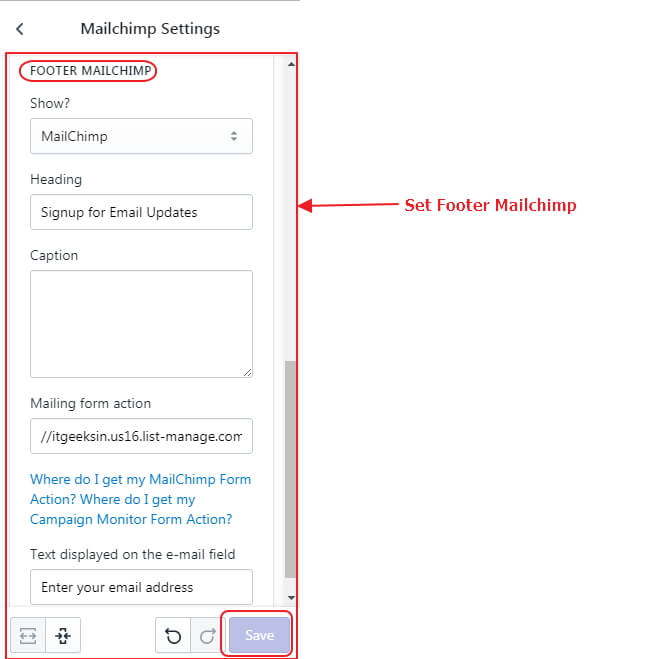
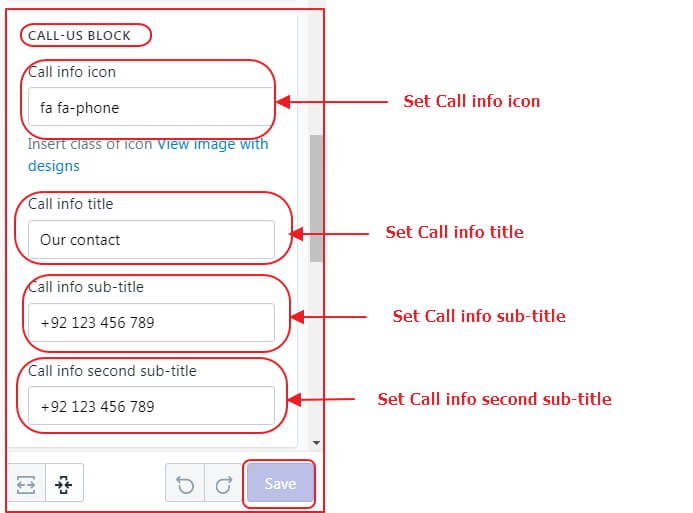
Now you can customize below

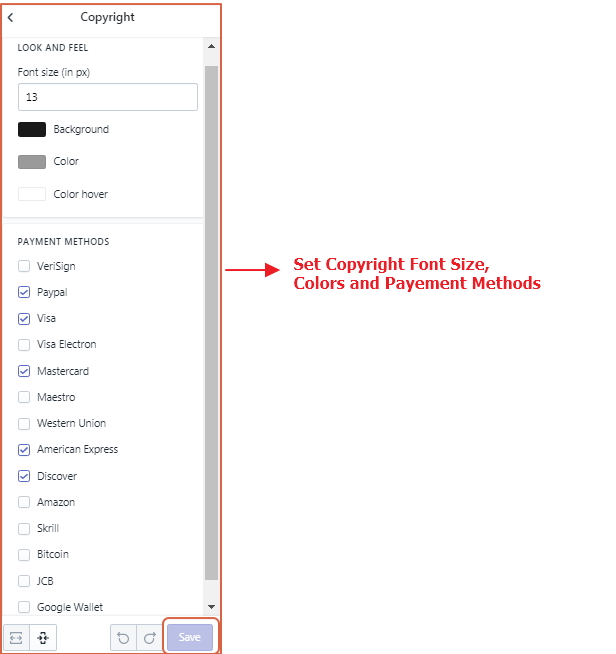
Now you can customize below

Now you can customize below

Now you can customize below
Now you can customize below
Now you can customize below
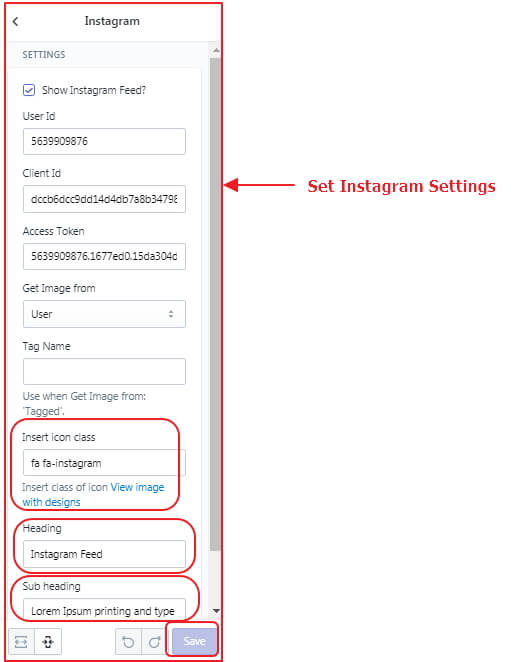


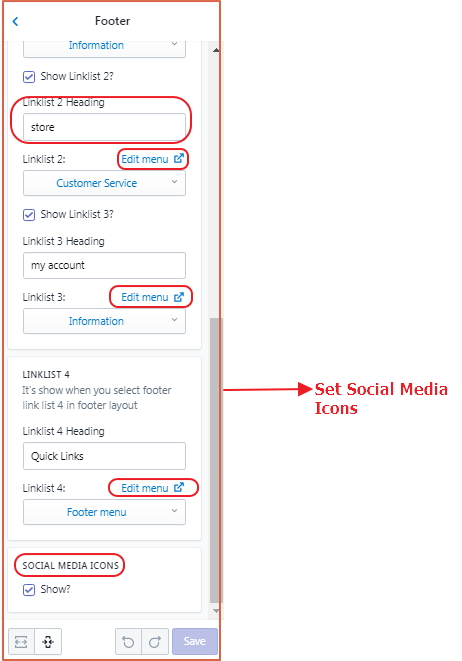
Social Config